Learning how to do drag makeup for beginners comes down to six stages: prep the skin, lay down a full-coverage base, sculpt with light and shadow, build the eyes, finish the brows and lips, then set everything so it survives the night. A first face takes most people 60 to 90 minutes, and the technique matters more than the products. Plenty of performers with modest kits outperform people with expensive shelves full of pigment.
Drag makeup is a performance skill built on ordinary makeup technique taken further than daily life calls for. Foundation gets built in thin layers instead of one swipe, shadow goes into the hollows of the face rather than just under the cheekbones, and colour on the lid is painted above your own crease. That exaggeration is the point: the look has to read from the back of a room and survive bright club lights.
This guide is for anyone learning it. Aspiring performers, allies doing a look for Pride, drag kings, and anyone who wants a full glam face for photos, a party, or a Halloween costume will all start in the same place. It also helps to know upfront that nobody owes this look to a single performer. Use tutorials as technique references, then build something that fits your own face.
Table of Contents
- What You Need
- Step-by-Step: How to Do Drag Makeup for Beginners
- Common Mistakes
- Frequently Asked Questions
- What products do I need to start drag makeup as a beginner?
- Do I have to block my eyebrows for drag?
- Are false lashes necessary for a beginner drag look?
- How long does it take to do drag makeup?
- How do I remove drag makeup without damaging my skin?
- How do I choose a drag style that is mine instead of copying a performer?
- Conclusion
What You Need
Drag Makeup for Beginners: The Essential Kit
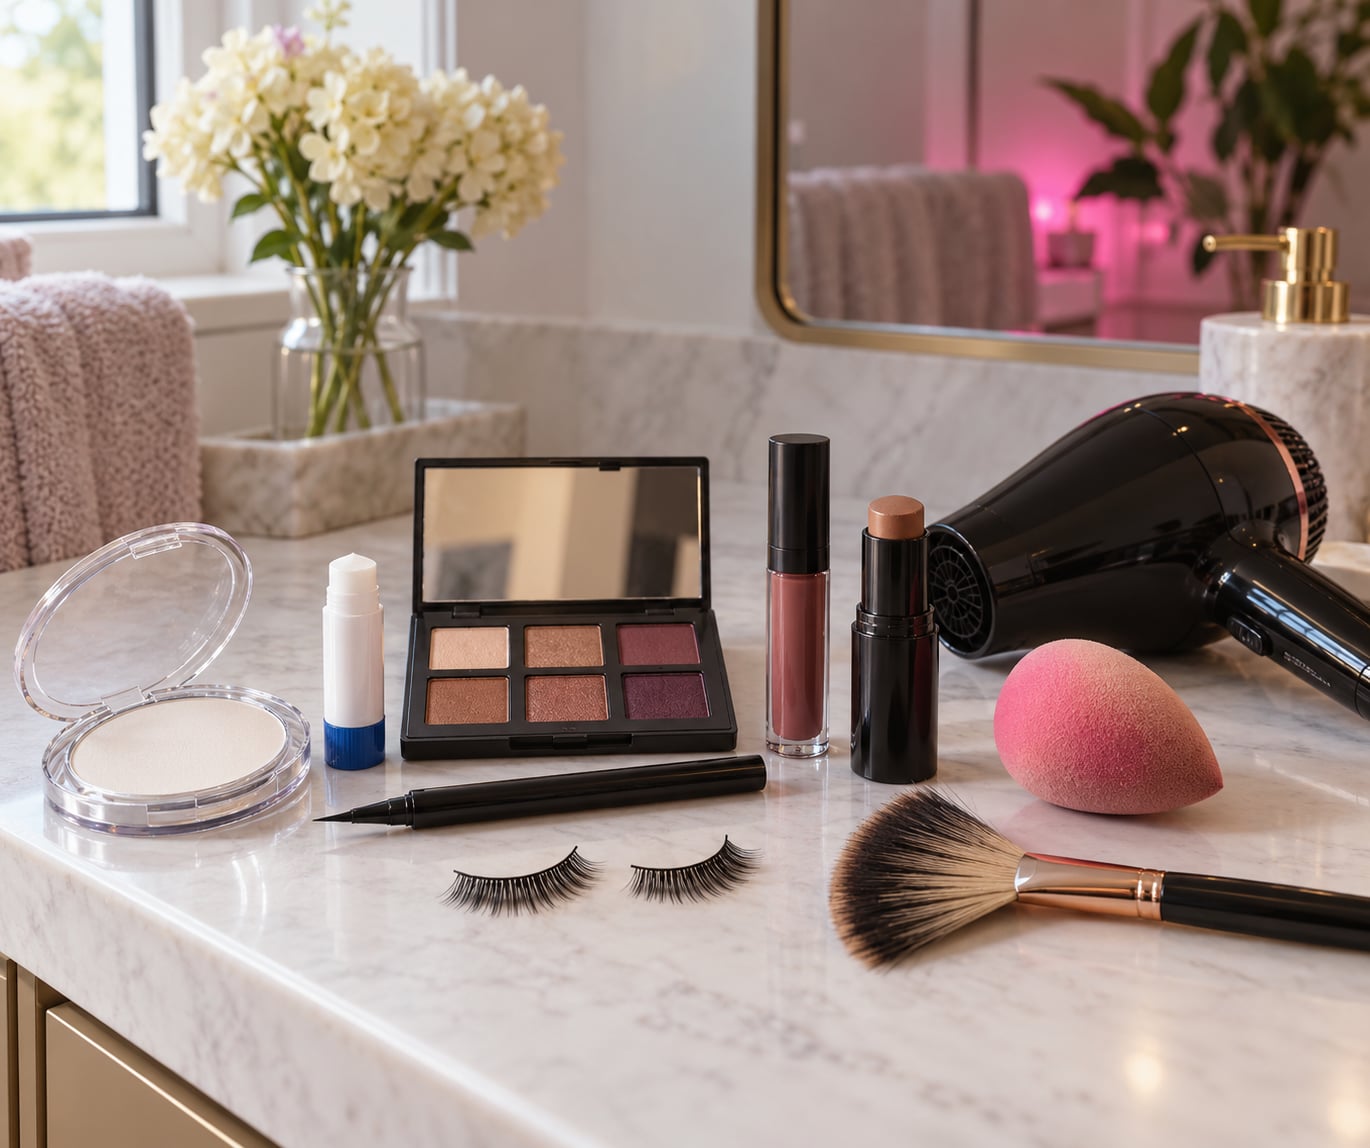
A workable beginner kit has seven categories. You can start with drugstore versions of all of them and swap in favourite brands later, and the whole list fits in a drawer rather than a suitcase.
Base. A pore-filling or silicone primer, a full-coverage liquid foundation, a full-coverage cream concealer, and a translucent setting powder. Stage-makeup lines such as Ben Nye or Kryolan are popular with performers because they are built to hold under lights without needing several thin layers, but any buildable full-coverage foundation works for a first attempt.
Brows. An extra-hold glue stick, a flat or angled brow brush, a brow pencil, brow powder or pomade, and a tinted or coloured mascara. Without the glue stick, the first four are decoration.
Sculpt. A cream or powder contour in a shade a few steps deeper than your base, a light matte highlight, and a fan brush or angled brush. Shimmer highlighter is optional and better saved for the finishing pass.
Eyes. An eyeshadow primer, a transition shade, a deeper lid shade, a pencil brush, and a black liquid eyeliner. Half a dozen shadows beat a fifty-shade palette, because beginners need three specific colours, not a full range to choose from.
Lashes. Mascara, lash glue, and a strip or cluster lash that fits your eye. Beginners do better with half a lash or a demi-wispy style than with the biggest pair in the box.
Lips. A lip liner, a liquid lipstick, and a gloss. Liquid formulas last longer under a microphone than cream lipstick does.
Tools. A damp sponge, a set of brushes, a pencil sharpener, a hair dryer or fan for setting powder, good lighting, and a mirror you can sit close to. Baby wipes are the cheapest fix for a brush that suddenly has baked concealer in it, and people on r/Drag recommend them constantly for exactly that.
Nice-to-have products include coloured setting powder, a cream paint stick for graphic shapes, and a stronger spray. Skip for now: baking powder experiments, lash magnets, and any product whose main appeal is the packaging.
Patch-test anything that touches skin for a long time. Put a small amount on your inner arm or behind your ear, leave it 24 hours, and look for redness or itching. Stop using any product that irritates you, and keep a barrier moisturiser in your kit so you can reset your skin between looks. If you shave as part of the look, moisturise well afterwards; dry or irritated skin patches under heavy base within hours.
Step-by-Step: How to Do Drag Makeup for Beginners
Work in daylight or under a bright neutral lamp, because yellow bathroom bulbs hide patchy edges. A front-facing phone with its light on is a surprisingly close stand-in for a ring light. Practise one side of the face first and compare it to the other before you commit, rather than building both sides and hoping they match.
Step 1: Prepare and Protect Your Skin
Cleanse, moisturise, then prime. The moisturiser smooths the surface so foundation settles into skin instead of clinging to dry patches, and the primer fills pores and gives the base something to grip. Give each layer about a minute, and do not apply the next one while the last is still tacky.
You know the base is ready when it feels like skin with a thin film over it, not tight or sticky. If your face starts pulling or itching, you have gone too thin or too fast. Wipe it off and start with less product.
Step 2: Even Out the Skin Tone
Apply foundation in thin layers, one or two shades lighter or more neutral than your own skin if you want to lighten your features, and blend down past the jaw, over the ears, into the temples, and across the neck. Most beginners miss the neck and temples, and that is the single most common reason a finished face looks like a mask sitting on top of the head.
Match the shade to the result you want, not to your bare skin. Test on the jawline rather than the back of the hand, and let the foundation sit for a few minutes before deciding whether it needs building. Where your skin is very deep, work in a peach or orange corrector first to stop blue-grey tones showing through a full-coverage base, and let a peach or orange pigmented powder set over it.
You can also skip the full-coverage base for a softer version. Tinted moisturiser, cream blush, and contour alone read as glam without flattening your features, which is a good first look for a party or a photo where nobody is expecting stage intensity.
Step 3: Contour, Highlight, and Shape the Face
Sculpting is light and shadow in the right places. Shadow goes in the hollow under the cheekbone, along the jaw, in the creases beside the nose, at the temples, and just under the lower lip. Light goes on the top of the cheekbone, the centre of the forehead, down the bridge of the nose, under the eyes, and on the cupid’s bow.
Use a sponge or a brush with a light hand, and blend in small windshield-wiper motions until there is no visible edge. A beginner-friendly alternative is a smaller amount of product, placed slightly higher and lighter than a tutorial shows you, so the look is shaping rather than transforming. If you contour too dark, you get stripes; if you stop halfway, you get a smudge. Take it slowly.
Keep the neck in mind. Contour the jaw but blend the neck transition with a little of your own foundation so the shading does not stop at the chin.
Step 4: Apply Eye Makeup
Start with eyeshadow primer to stop the colours creasing, then lay a transition shade in the crease of your own eye. Build a cut crease next, which means painting a defined line of light colour just above your natural crease and filling above it with the deeper shade. It is a graphic shape rather than a blend, so treat it as drawing, not smudging.
Follow with a dark shade in the outer V, which is the outside corner of the lid where it meets the crease, and keep the inner corner lighter. Apply a thicker liner than feels natural. A bold wing hides small errors, and beginners are always surprised by how forgiving a heavy line is compared with a thin one.
Rest your elbow on a stable surface, look straight ahead rather than down, and draw the wing as a line angled upward from the outer corner, then fill the triangle underneath. Then mascara. Leave a moment to dry before you go near lashes with glue.
False lashes are optional. If you wear them, measure them against your own lash line first, trim the outer edge if they overhang, and let the glue get tacky for about 30 seconds before pressing them on. Set them with a fingertip in the middle and the outer corners, not along the whole strip, so the band stays flexible. New wearers often get glue that is too wet, which slides the lash, or too dry, which will not hold. Wait for tack, not for wet or fully dry.
Tuck a white or opaque pencil into the lower waterline to make the eyes look bigger. It is a small step with a large effect and most beginners skip it.
Step 5: Finish the Brows, Lips, and Details
For the brows, decide whether you are blocking them or drawing over them. Blocking means pressing extra-hold glue stick over the hair, flattening it with a brush, dusting translucent powder on top, and letting it dry while you do your eyes. On r/Drag, people who block recommend several thin glue passes with powder between them, roughly five, rather than one thick coat. Start at the inner brow, where hair grows most stubbornly, and leave it about five minutes to set. If brows ghost through the base, the fix is more glue passes, not heavier powder.
You can skip blocking entirely. Plenty of full glam faces simply draw on brows high and long with pencil and powder, and it is a legitimate look. Whatever you choose, set the brow hair with a spoolie and tinted mascara.
For the lips, line slightly outside your lip line, overline the cupid’s bow, and fill with liquid lipstick. Beginners get a cleaner result starting at the outer edge of each corner and drawing inward. Add gloss to the centre of the lower lip for dimension.
Glitter, gems, and false lashes on the face come last. Pick one statement feature first, usually either the eyes or the lips, and let the rest stay quiet. A look that is bold everywhere at once is much harder to control than one that is bold in a single place.
Step 6: Set the Makeup and Check the Finish
Dip a sponge in setting powder and press it under the eyes, along the T-zone, and anywhere you layered heavy product, then dust the rest lightly. This technique is called baking, and letting it sit for five to ten minutes before brushing off helps shadows stay sharp and stops fallout making your face look dusty at the end of the night.
Finish with a setting spray and let it dry fully, about a minute. The makeup is set when you can pat it with a clean finger and nothing lifts, and the shine has gone from wet to matte. Step back and look at the whole face, then check it in a different light.
Photograph the look as well as mirroring it. A camera sees contrast and texture differently, and most people discover their contour is a stripe or their blush sits too high only once they see a picture. Fix smudges now rather than in the car on the way to the venue.
Common Mistakes
Too much product at once. Two thin layers of foundation beat one thick one. Thick layers set into pores and lines, and they are much harder to blend or remove.
Contour stripes. Use less product than you think, start at the outer edge of the face, and blend outward as well as inward until no edge is visible.
Harsh, unmixed colours. Lay your transition shade down first and give it more time than you think. Every harsh edge starts as a blend that stopped early.
Ignoring the neck, ears, and temples. These are the giveaway areas. Take foundation and a little shading past the jaw, over the ears, and up to the hairline.
Lashes that will not stay on. Let the glue go tacky before pressing, press only the centre and outer corner, and keep a spare strip nearby.
Asymmetric wings and brows. Draw both eyes first, compare them side by side in a mirror held at arm’s length, and adjust the weaker side last. Not every wing will match on your first attempts, and that is fine.
Practising in bad light only. Check the finished look in daylight and in a photo before you commit to it.
Copying one performer exactly. This is the most common frustration beginners describe on r/Drag. Their face shape, brow height, and colouring are not a template. Borrow the technique, then adjust the placement to your own features until it stops looking like a copy.
When you practise, work slowly and finish the same full face regularly rather than experimenting on a different technique each time. Set a photo of the look you are going for, work from the outside of the face inward, and wipe mistakes off with a cotton pad and a little cleanser instead of adding more product on top. If you perform, do a full run-through in the clothes and hair you will wear, because a look that reads in a robe at home can vanish under stage lighting.
Frequently Asked Questions
What products do I need to start drag makeup as a beginner?
Start with seven categories: primer, full-coverage foundation, full-coverage concealer, translucent setting powder, an extra-hold glue stick, a small eyeshadow palette with a transition shade and a deeper lid shade, liquid eyeliner, and a liquid lipstick. Add mascara, lash glue, a contour, a light highlight, and a sponge. That is a complete first face. You can keep it in a drawer and upgrade one product at a time.
Do I have to block my eyebrows for drag?
No. Brow blocking is one route to a high, clean brow line, not a requirement. Plenty of full glam faces simply draw on brows with pencil and powder and leave the natural hair in place. If you do block, use an extra-hold glue stick in several thin passes, dust translucent powder between them, and wait about five minutes. The goal is a shape you can draw on, not bare skin.
Are false lashes necessary for a beginner drag look?
They help, but they are not required. A well-drawn wing and two coats of mascara read clearly at most party and photo distances. When you are ready to try strips, start with a half lash or a demi-wispy style, measure the band against your own lash line, trim the outer edge if it overhangs, and wait about 30 seconds for the glue to go tacky before pressing it on.
How long does it take to do drag makeup?
Expect 60 to 90 minutes for a full face once you know the order, and closer to two hours while you are still learning. Brows, base, and blending take the most time. A pared-back version for a party or a Pride event takes around 30 to 45 minutes, because you skip brow blocking, the cut crease, and the second highlight layer.
How do I remove drag makeup without damaging my skin?
Remove it the same night rather than the next morning, because glue and long-wear formulas set the longer they sit. Start with an oil-based cleanser or balm, massage it onto dry skin, and wait a minute before adding water. Follow with a gentle wash, then a rich moisturiser. Peel glue off skin slowly with a fingertip, never a cloth, and use a patch test before trying anything stronger on a sensitive face.
How do I choose a drag style that is mine instead of copying a performer?
Pick two or three performers whose technique you admire, then write down what you actually want from their looks: brow height, lip shape, how dark the sculpt goes. Try those specific features on your own face and keep the ones that flatter you. The most useful beginners are the ones who borrow a technique, adjust the placement, and end up with a look nobody else has.
Conclusion
Learning how to do drag makeup for beginners is a matter of order and repetition rather than expensive products. Prep the skin, build a full-coverage base in thin layers, sculpt with light and shadow, shape the eyes, decide on the brows and lips, then set everything and check it in daylight.
Start with a kit you can afford, choose one statement feature rather than five, and let your first two or three attempts be imperfect. Patch-test what you put near your eyes and on your skin, take it off properly the same night, and keep going back to the same look until it feels like routine. Then start adjusting it, because the version of drag that suits you is the one built on your own face.