To start cycling in the city, get a bike that fits you, spend a few hours learning to start, stop, steer and signal somewhere with no traffic, and then ride short trips on quiet residential streets before you touch a busy road. Most beginners are ready for their first real commute within three or four weeks of twice-a-week practice.
The mistake I see again and again is trying to go from zero to a 25-minute city commute in a single weekend. That is how people end up white-knuckled on a road with four lanes of traffic, convinced they are bad at something they simply had not practised yet.
Here is the order that works: equipment you actually need, six steps from bike choice to a repeatable routine, the mistakes worth avoiding, and answers to the questions beginners ask most.
Table of Contents
- What You Need
- Step-by-Step
- Common Mistakes
- Frequently Asked Questions
- Is cycling in a city dangerous for beginners?
- What type of bike is easiest for riding in the city?
- How long should a beginner cycle before adding distance?
- Do I need to wear special cycling clothes in the city?
- How can I cycle safely at night or in bad weather?
- What should I do if I feel unsafe on a busy route?
What You Need
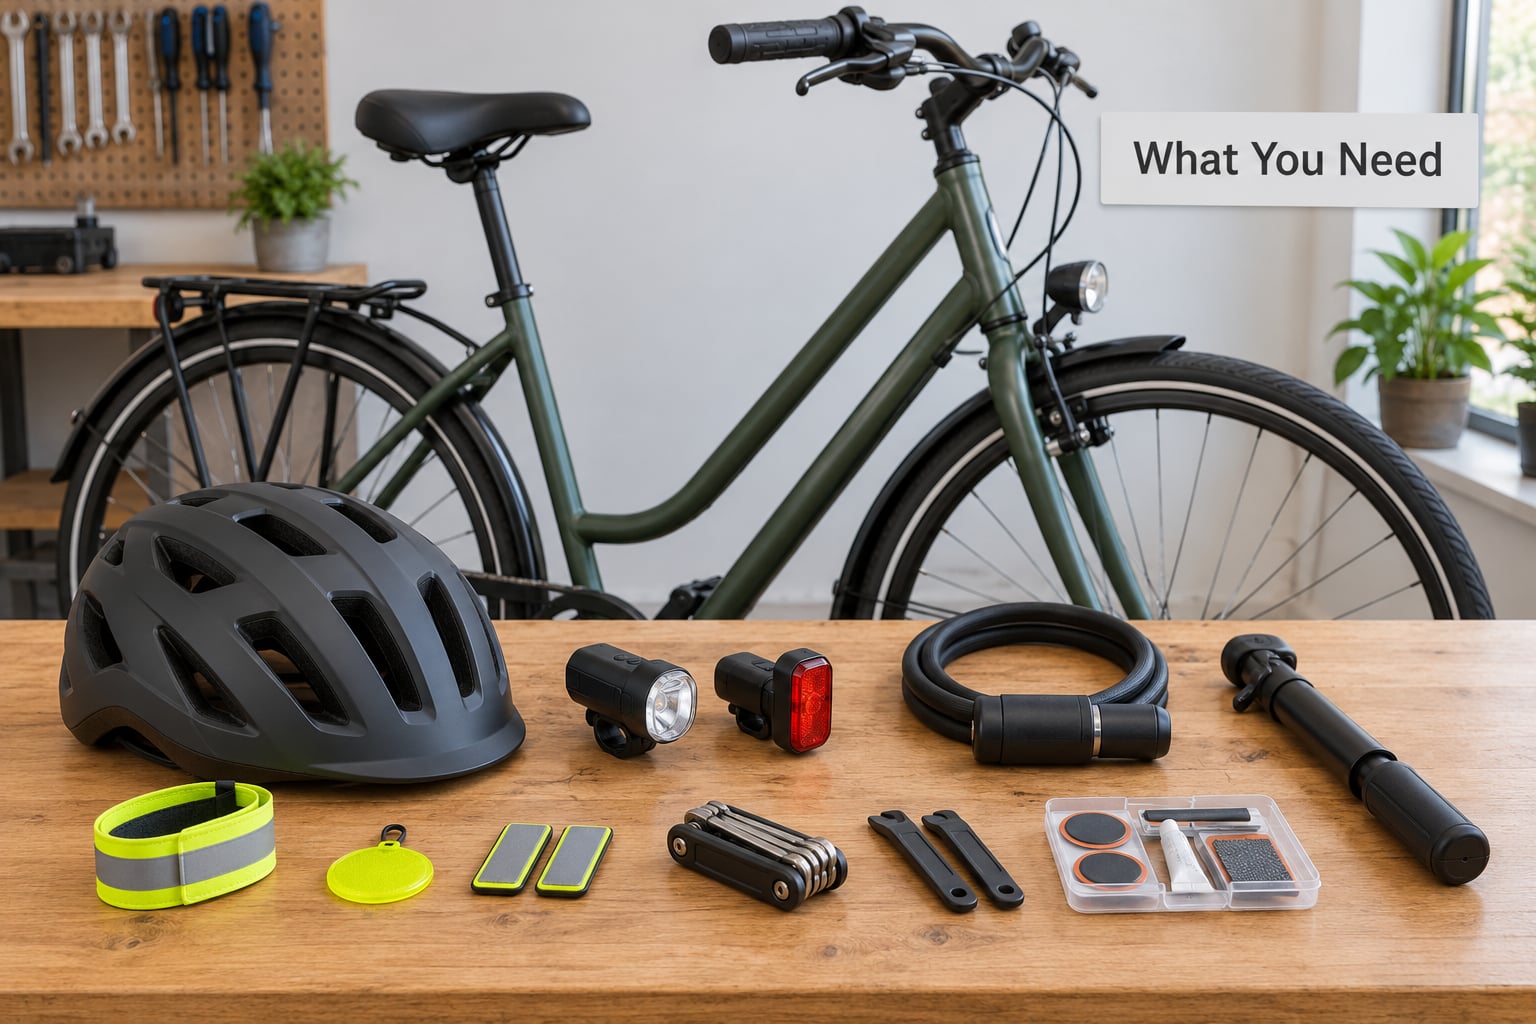
Start with the short list. Buy the safety items first and resist everything else until you are riding regularly.
Required
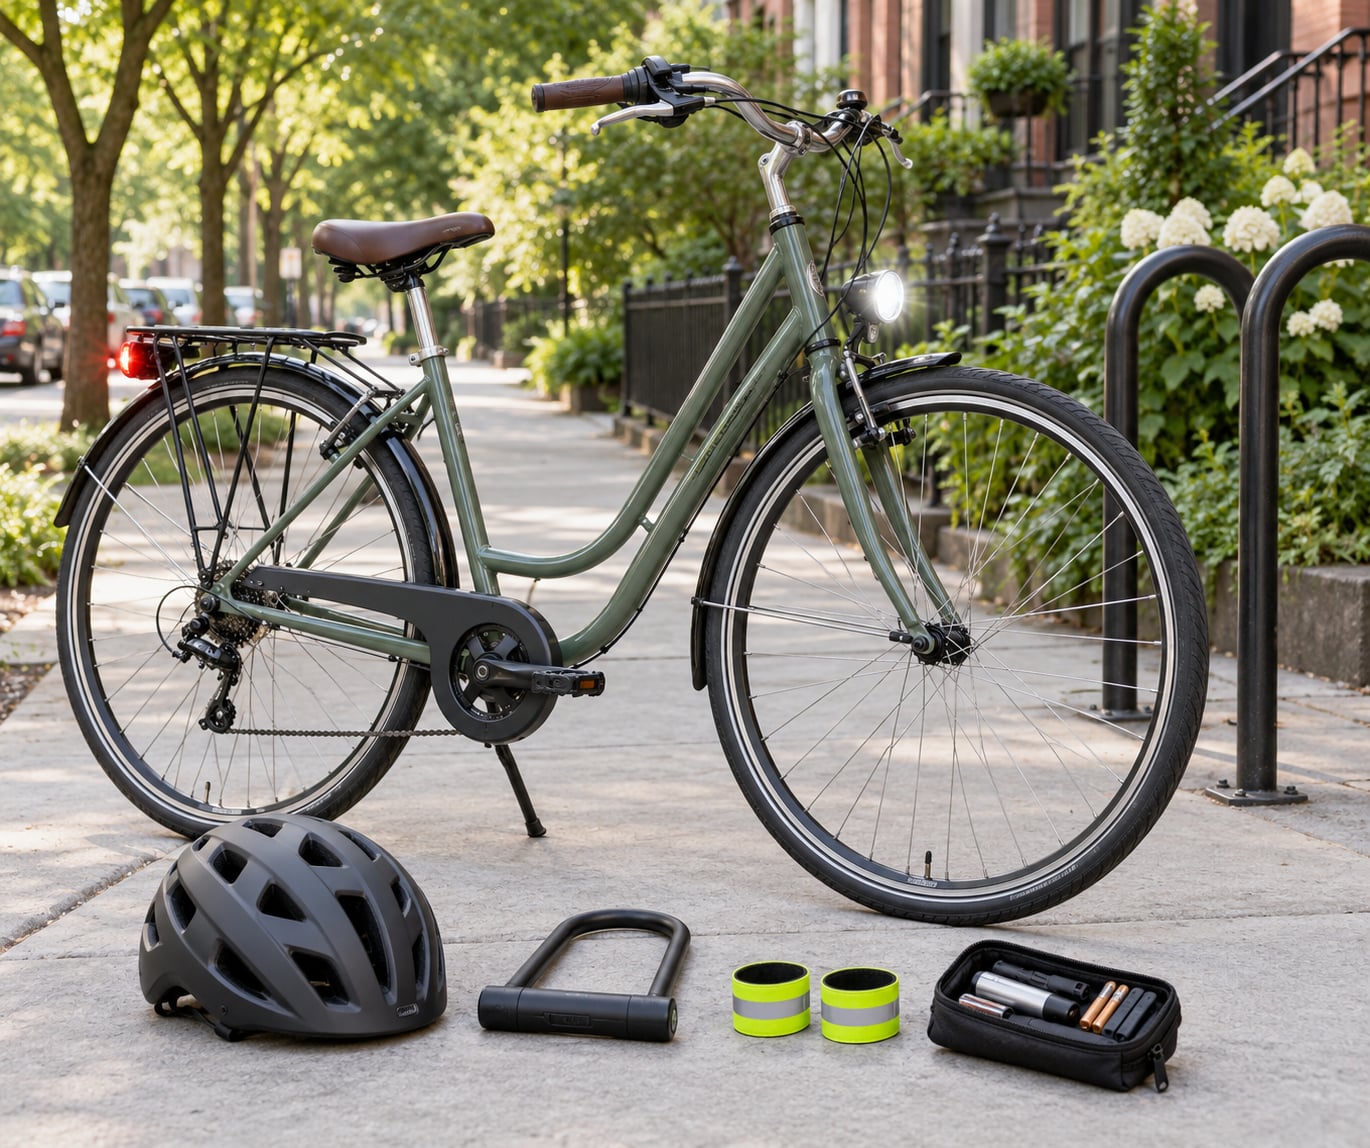
- A bike that fits. Not a perfect bike. A used hybrid or city bike that has been adjusted to you is enough. Borrowed and shared bikes count too.
- A properly fitted helmet. Cheap certified models exist and they do the job. Fit matters more than price.
- A front white light and a rear red light. Required by law in many cities after dark, and useful all day in winter.
- A solid lock. One U-lock through the frame and a rear wheel beats two cheap cables.
- Tyre pressure and brakes that work. Check both before the first ride, not after.
- A phone or a route planner app. Useful for planning, not for staring at while riding.
- A small repair kit. Two levers, a spare tube, tyre levers, a patch kit and a mini pump fit in a saddle bag.
Useful but not urgent
- Reflective tape, a helmet mirror or handlebar mirror, and a bar bag or panniers once you start carrying anything.
- Rain shell and gloves if your season calls for them. You can ride in ordinary clothes for most city trips.
- A bike computer or a mount for your phone, if you like knowing your speed.
Optional
Clip-on aero bars, carbon wheels, a saddle with a cutout, fancy cycling kit, cleats. None of them make you safer, and most beginners never notice the difference. Buy them years later, if ever.
| Gear | Why it matters for city riding | When to get it |
|---|---|---|
| Helmet | Road-safety research consistently finds a properly fitted helmet substantially lowers the risk of head injury in a fall or collision | Before the first ride |
| Front white and rear red lights | Make you visible in daylight drizzle and at dusk, when most urban collisions happen in the blind spot of a car door | Before the first ride |
| U-lock plus cable | Thieves look for the fast grab; a frame-through U-lock removes most opportunistic targets | Before the first ride |
| Repair kit and pump | Turns a flat from a ruined evening into a five-minute roadside delay | Before the first long ride |
| Panniers or backpack | Shift weight off your back on errands and commuting trips | When you start carrying work or groceries |
| Reflective gear | Works at dusk and in headlights, when bright clothing alone stops being enough | Before your first night ride |
| Mirrors | Let you check over your shoulder for cars while keeping your head forward | Once you are riding in traffic |
One note on gear honesty: if a piece of kit only earns its place on a weekend twenty-mile ride, it does not need to be bought in week one.
Step-by-Step
How to start cycling in the city by choosing the right bike
Beginners agonise over the bike choice. The choice that actually matters is whether the bike fits your shortest realistic route and whether you can store it where you live.
City bikes with upright bars and fenders suit flat, stop-start streets and short errands. Hybrids with slightly wider tyres and a more neutral position handle rougher pavement and longer rides better. Folding bikes win in apartments with no storage and work on trains. E-bikes flatten hills and headwinds, which is the single biggest factor for people who are not fit yet or live near a bridge or an expressway. Bike share removes the purchase decision entirely, which makes it the best possible trial.
| Bike type | Best for | Watch out for |
|---|---|---|
| City or upright | Short trips, errands, dense traffic, frequent stops | Less efficient on hills and long rides |
| Hybrid | Mixed routes, park paths, longer weekend rides | A little more exposed to potholes |
| Folding | Apartments, trains, buses with bike racks | Handling is unfamiliar at first |
| E-bike | Hills, headwinds, carrying passengers or loads | Heavier, more expensive, still needs a lock |
| Bike share | Trial riding, one-way commutes, visitors | Seat height on the tall docks; no personal lock for long trips |
Fit beats brand. A frame that is slightly too large is harder to control than one that is slightly too small, and a saddle you can adjust matters more than the component list on the frame.
Two quick fit checks you can do in a doorway. Straddle the top tube and keep at least two fingers of clearance, or you cannot stand over it at a red light. Then sit on the saddle and check that with your heel on the pedal at the bottom of the stroke your leg is nearly straight, which means a small bend with the ball of your foot.
Riders on bike commuting forums are consistent on one point about acquiring a bike: if you do not take the lane and hold a predictable line, every close pass becomes your risk. That comes later. Right now, the only decision is whether the bike fits.
How do you know step one worked? You can get on and off the bike, reach the brake levers with straight arms, and ride around a block without thinking about the frame.
How to start cycling in the city by planning easier routes
Most beginner confidence is won on residential streets, not in traffic. Route planning is the single highest-return skill for a new city rider, and it takes an afternoon.
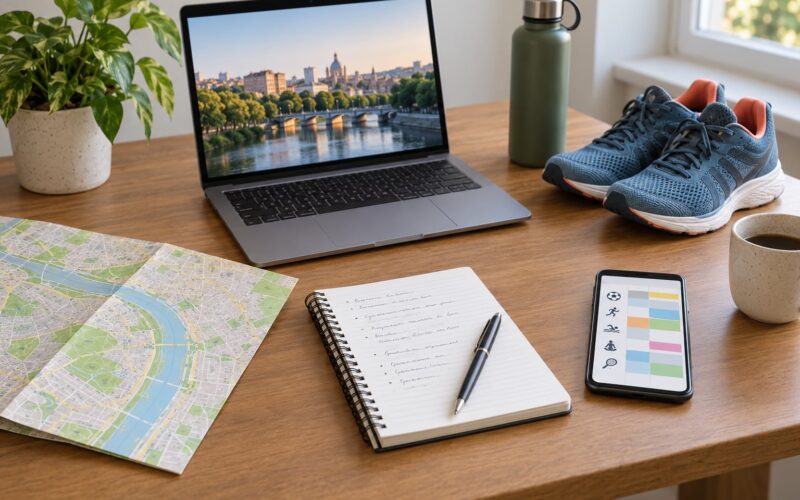
- Turn on the cycling layer in your map app and compare three ways to the same destination. Look for traffic numbers, not just speed.
- Prefer protected lanes where they exist. They are physically separated by a curb, planter or parked cars, so no driver can drift into you.
- Treat paint as paint. A painted bike lane with parked cars on its right side still forces you into the door zone.
- Look for bike boulevards, low-traffic residential streets that have been redesigned to calm cars.
- Use multi-use trails and park paths to connect neighbourhoods without riding an arterial road.
- Check the route at rush hour on a Sunday, when traffic volume looks close to your real weekday.
One rider put it bluntly on a cycling forum: bike lanes are not where you learn to ride a bike. Learn somewhere flat and empty first, then use the lane.
Plan a 20-minute loop close to home and ride it twice before you ride it to work. That short test tells you the junctions, the crossings and the stretch where you lose your nerve, while the consequences of quitting are small.
One reader on a big cycling forum complained that a good cycling city should not require insider knowledge just to move around. It is a fair point, and the practical answer for now is to build your own quiet-route map and learn the two or three streets you can bail onto at any point.
How do you know step two worked? You can name the junction where you feel tense and a second street that lets you avoid it.
Learn essential skills in a low-pressure setting
Find a flat, empty, private space: a parking lot at a quiet weekend hour, a park path, a schoolyard closed for the weekend. Spend two or three sessions there before riding in traffic. You are learning five things, and none of them require a moving car.
- Starting and stopping. Ride at walking pace with both feet down until the bike holds itself. Then start with one foot down and pedal. Practise stopping under control, not abruptly. Weight back, hands light, one foot down when nearly stopped.
- Turning. Look through the turn, not at the front wheel. Practise wide arcs and, when you get there, tighter ones.
- Signalling. Straight left arm out to signal a left turn from the travel lane, left arm bent up at the elbow to signal a left turn from a bike lane or turn lane, and the same shapes mirrored for a right turn from a bike lane. Hold the signal for at least three seconds and keep the hand up until the turn is finished.
- Shifting gears. Sit in the saddle and shift every gear while pedalling gently. Learn the sound each gear makes. Aim for a steady, unhurried pedalling speed rather than a number on a screen, but most riders settle somewhere around 70 to 90 revolutions per minute once the shift becomes automatic.
- Braking. Practise stopping from a moderate speed using both brakes evenly. Locking one front brake at speed is how most beginner falls happen, and it is entirely avoidable with practice.
- Scanning. Ride in a straight line and look left, right, and behind every few seconds without swerving. Get used to checking behind you while staying still in the lane.
One rider recommended going genuinely slow on a first attempt, about 5 to 8 miles an hour, and giving everyone plenty of room. Slow is safe and it teaches balance faster than speed does.
If you never learned to ride as a child, this step takes a session or two longer. Plenty of adults have learned it in a single afternoon with the same method. The part that takes longer is the fear, not the balance.
How do you know this step worked? You can signal, turn and stop smoothly without looking at your hands.
Prepare for predictable city hazards
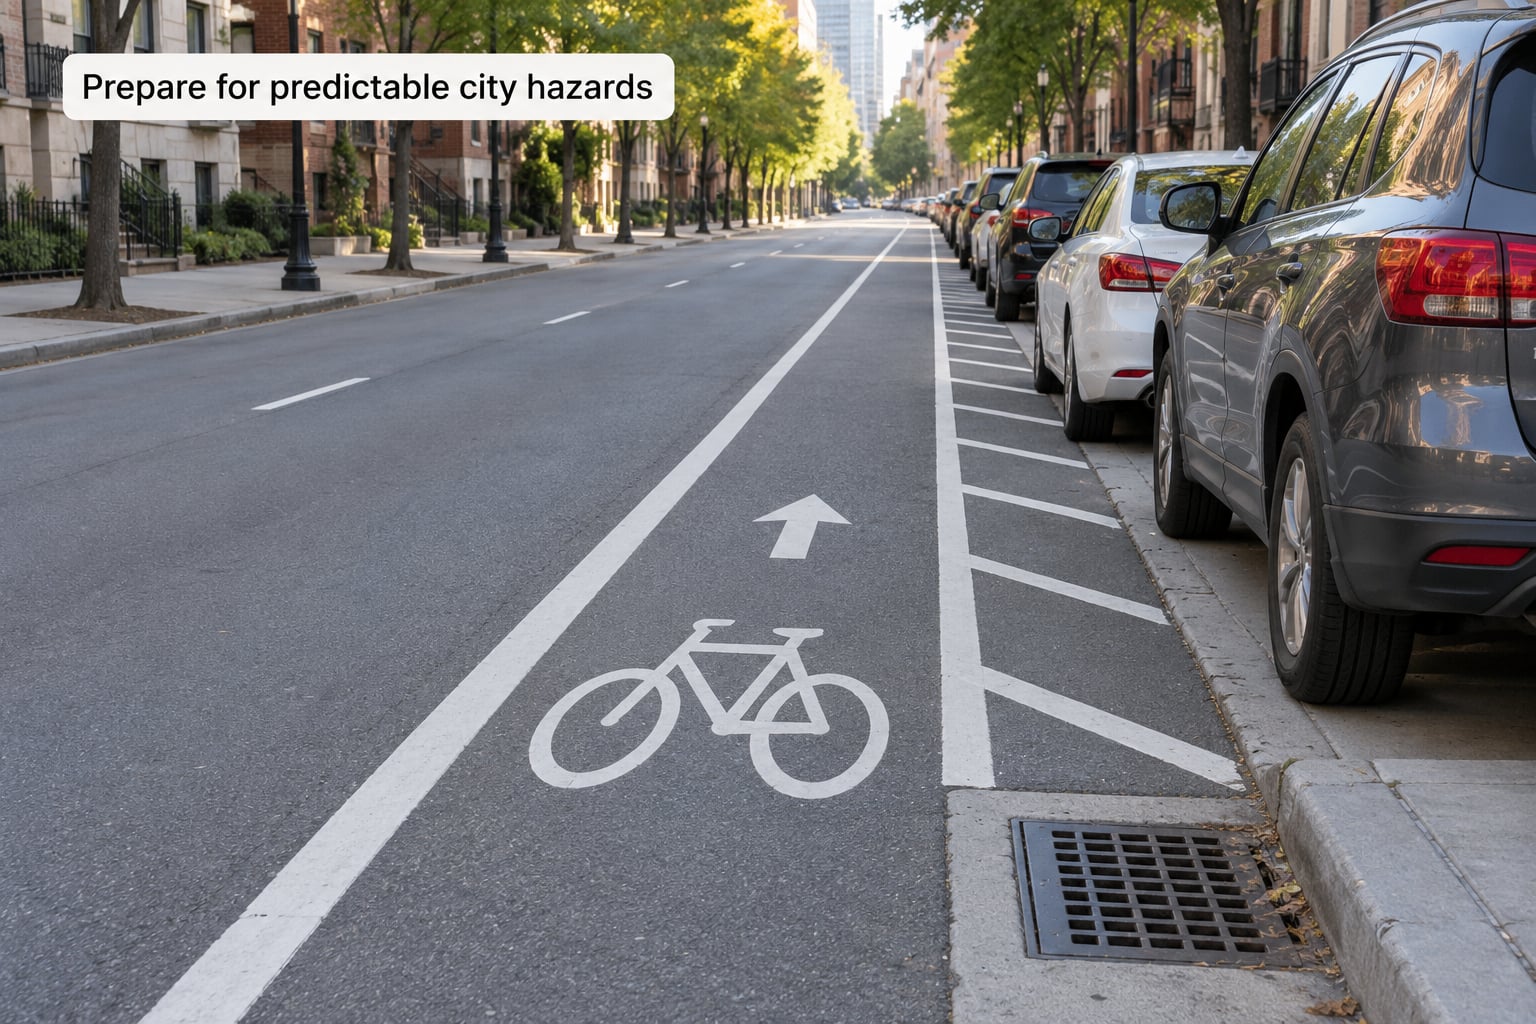
City hazards are not random. They are a short list that repeats on every street, and each one has a correct response you can learn in an afternoon.
Door zone. This is the strip roughly three to four feet wide next to parked cars where an opening driver door reaches into your path. The fix is position: ride outside it. On a street where you cannot fit between parked cars and moving traffic safely, take the lane and pass on the left when you are ready to.
Take the lane. The law in all 50 states uses the word practicable in its phrase about riding as far right as practicable. Practicable means as far right as is safe and reasonable, not as far right as physically possible. On a road with a parking lane and fast traffic, the safe line is the right third of the moving lane, clearly visible, not hugging the curb.
Intersections and left turns. This is the manoeuvre new riders find hardest and the one forum readers ask about most. Move into the centre of your lane or turn lane before you reach the intersection, signal, then check over your shoulder. While you are in the intersection and someone crosses or turns across you, hold your line and keep pedalling predictably. Stopping in the middle of a junction makes it harder, not easier.
People, not vehicles. Announce yourself early with a bell or a clear “on your left” when you pass another rider. Pedestrians step out from between parked cars without looking, so slow down around doorways and driveways.
Painted lanes and their gaps. Scan the bike lane, not just the car lane. Sewer grates catch narrow front tyres and can throw you sideways; ride around them. Debris, glass and drain covers collect in the gutter. Painted lanes sometimes end abruptly, so know your fallback line before you get there.
Rail tracks and grooves. Cross them close to a right angle, at a walking pace, with your pedals level.
Water and darkness. Wet tram tracks, painted crossings and metal covers are slickest in the first minutes of rain. At night, a front white light and a rear red light change how visible you are more than any other single thing you can do.
Being in the way. A regular on a large cycling subreddit put this better than I can: be a bike ambassador. Signal early, hold a steady line, do not weave between queued cars, and do not force a car to brake hard. Being predictable is what makes drivers relax around you.
How do you know this step worked? You have ridden a full week of commutes and have a plan for every junction on the route, not just a memory of it.
Build a short and sustainable riding routine
Frequency beats intensity. One ride a week, done for two months, builds more skill and more habit than five rides in the first week followed by nothing.
| Week | What to do | How it should feel |
|---|---|---|
| 1 | Two sessions of basic skills in an empty space, plus one 15-minute quiet-street ride | Unsteady at first, then fine |
| 2 | Two 20-minute rides on your quiet loop, one at the weekend | You know where you will slow down |
| 3 | Add one trip with a small amount of traffic, such as a wider road at off-peak | Alert rather than frightened |
| 4 | Attempt the real route end to end, or the transit plus bike version of it | Tired legs, steady head |
Once the routine holds, add purpose rather than speed. A commute to work, a grocery run on a basket or panniers, a Saturday ride along a trail with no destination, and one mixed-mode trip where you ride to a station and take the train or bus the rest of the way.
The sweat problem is the reason most commuters quit in week three. Solve it before it arrives: choose a pace you can hold, wear breathable layers you are not precious about, and leave a T-shirt, deodorant and change of socks at work. A light backpack carries all three. Longer-term, ask about a shower-only gym membership rather than assuming you need a full gym.
Riding with other people is worth a lot for confidence, and it takes less organisation than beginners expect. Look for a club that explicitly welcomes beginners, no-drop social rides and adaptive sessions rather than race-focused groups, and ask whether they have a ride you can join before you need to keep a pace.
How do you know this step worked? You have ridden at least once a week for a month without needing motivation to start.
Use maintenance, security and weather backups
Most beginner breakdowns are a soft tyre and most beginner heartbreaks are a missing bike. Both are cheap to prevent.
The ABC check before every ride. Air: squeeze the tyres and look at the label for the pressure range. Brakes: squeeze both levers and confirm each pulls. Chain: check it is clean, oiled and free of stiff links. A full check takes under two minutes and catches most problems before they happen.
Monthly care. Wipe the chain, add a drop of chain lube, wipe off the excess. Check the tyres for cuts and pressure loss. Keep the gears shifting and the brakes biting cleanly. If you are not confident with a puncture, learn the levers-and-tube method once on a spare wheel at home, because a flat on the way home is a common reason people stop riding.
Locking. One U-lock through the frame and the rear wheel, plus a second lock or cable for the front wheel. Lock to a proper rack rather than a decorative railing, register the serial number, and take the key off when you walk away. Two locks in the same place are better than one. Full-time security, if you can afford it, is the only real answer to a high-theft area.
Forum riders report thefts even with a U-lock, usually from unlocked or poorly locked bikes. The practical fix is boring: commit to two locks every single time, and use the second one on the wheel most thieves target.
Bad weather backups. Decide in advance what stops you riding. Heavy rain and ice usually should; a cold, clear commute usually should not. Rain gear for city riding is a shell and gloves, not waterproof cycling bibs. For days you would rather not ride, have a one-leg plan that keeps you moving: transit to a different stop and walk the rest.
How do you know this step worked? Your bike has not failed you mechanically in a month, and you know your backup plan for rain.
Common Mistakes
Mistake one: starting on a busy road because the route is shorter. Confidence comes from repetition on an easy route, and the extra three minutes is cheaper than a first week spent white-knuckled. Ride the quiet loop ten times before you ride the arterial.
Mistake two: riding too close to the curb to be polite. Bike commuters are blunt about this: hugging the curb invites closer passes, and each one is a risk. Hold a visible, steady line instead. Predictable is safer than polite.
Mistake three: buying the bike before riding. Bike share or a borrowed bike tells you how you feel about real traffic in an afternoon. A purchase made in week one is often made by hope.
Mistake four: buying kit before you know what you need. Those padded shorts everyone said were silly look very different after an hour on a saddle. Buy gear for the ride you have actually done, not the one you are planning.
Mistake five: treating every bike lane as protection. A painted lane with cars parked to your right is still a door zone. Scan it, and be ready to move out.
Mistake six: skipping the shoulder check. The blind spot is exactly where you are not looking. Every lane change, every turn and every overtake of a parked car starts with a check behind.
Mistake seven: stopping in the middle of an intersection. Keep rolling predictably while people cross in front of you. Disappearing mid-junction is what turns an awkward moment into a collision.
Mistake eight: going big, then quitting. Six weeks of three hard rides is a worse training plan than six weeks of two easy ones, because the sore legs and the fear both arrive together.
Three habits cover most of it. Ride the same short route every time until it is boring. Do the ABC check before you leave the door. Signal everything, early and clearly. Confidence is mostly familiarity wearing a better-fitting bike.
Frequently Asked Questions
Is cycling in a city dangerous for beginners?
City cycling risk is real and concentrated in a few predictable places: doors, junctions and poor visibility. Beginners cut that risk sharply by practising handling in an empty space first, riding quiet streets before arterials, holding a visible line, and checking over the shoulder before every change. Millions of people commute by bike in dense cities every day, usually on routes they planned carefully rather than the fastest one.
What type of bike is easiest for riding in the city?
For most beginners, a city bike or hybrid with upright handlebars, fenders and lights is the easiest to ride because it is stable at low speed and comfortable in traffic. Folding bikes suit small flats and transit. E-bikes remove the hardest part for many beginners, which is hills and headwinds. Bike share is the lowest-commitment way to test whether you enjoy city riding at all before buying anything.
How long should a beginner cycle before adding distance?
Stay on the same short route for two or three weeks, roughly two rides a week, until steering, stopping and signalling happen without conscious thought. Then add a single element at a time: a longer trip, a busier road, an evening return, or a loaded pannier. Most riders reach comfortable commuting confidence after four to six weeks of regular practice.
Do I need to wear special cycling clothes in the city?
No. Ordinary clothes work for most city trips; loose trousers, a T-shirt and comfortable shoes are fine. The exception is the saddle, where padded cycling shorts genuinely help once you are riding regularly. Breathable layers and gloves make wet, cold commuting bearable, and carrying a spare shirt and socks in a backpack solves the sweaty arrival at work without changing your whole wardrobe.
How can I cycle safely at night or in bad weather?
A front white light and a rear red light are the biggest changes you can make, followed by reflective tape on wheels, pedals and your bag. Wear brighter colours than feels reasonable, because you are aiming at being seen from the side as well as the front. In rain, ride a little slower, brake earlier, and expect metal grates, painted crossings and tram tracks to be slippery in the first minutes of rain.
What should I do if I feel unsafe on a busy route?
Slow down, move as far from the kerb as is safe, stay in the open where drivers can see you, and pick a route you would rather be on. If a driver crowds you, hold your line and do not speed up to correct them. If a route consistently feels bad, change it permanently and stop treating that as failure. Choosing a different road is good riding, not giving up.
Start tomorrow with two things and nothing else: book an hour in an empty space to learn starting, stopping, signalling and shifting, and find one twenty-minute loop of quiet streets near your home. Ride that loop four times before you change anything about your route or your bike. Learning how to start cycling in the city is mostly repetition in the right place, and the fitness, the savings and the freedom follow on their own schedule.