Leather shoes last decades when you clean, condition and protect them on a schedule, and go stiff, blotchy and cracked within a few years when you skip it. The short version of how to care for leather shoes: brush off the dirt, clean with a gentle leather cleaner or saddle soap, condition while the leather is still slightly damp, then buff on cream or wax and finish with a water-repellent spray. Ten minutes per pair, a few times a month, is the whole job.
The catch is that leather is not one material. A smooth full-grain boot, a suede desert boot and a patent loafer can each be ruined by a product that would improve another, so the finish comes first, then the routine.
Table of Contents
What You Need
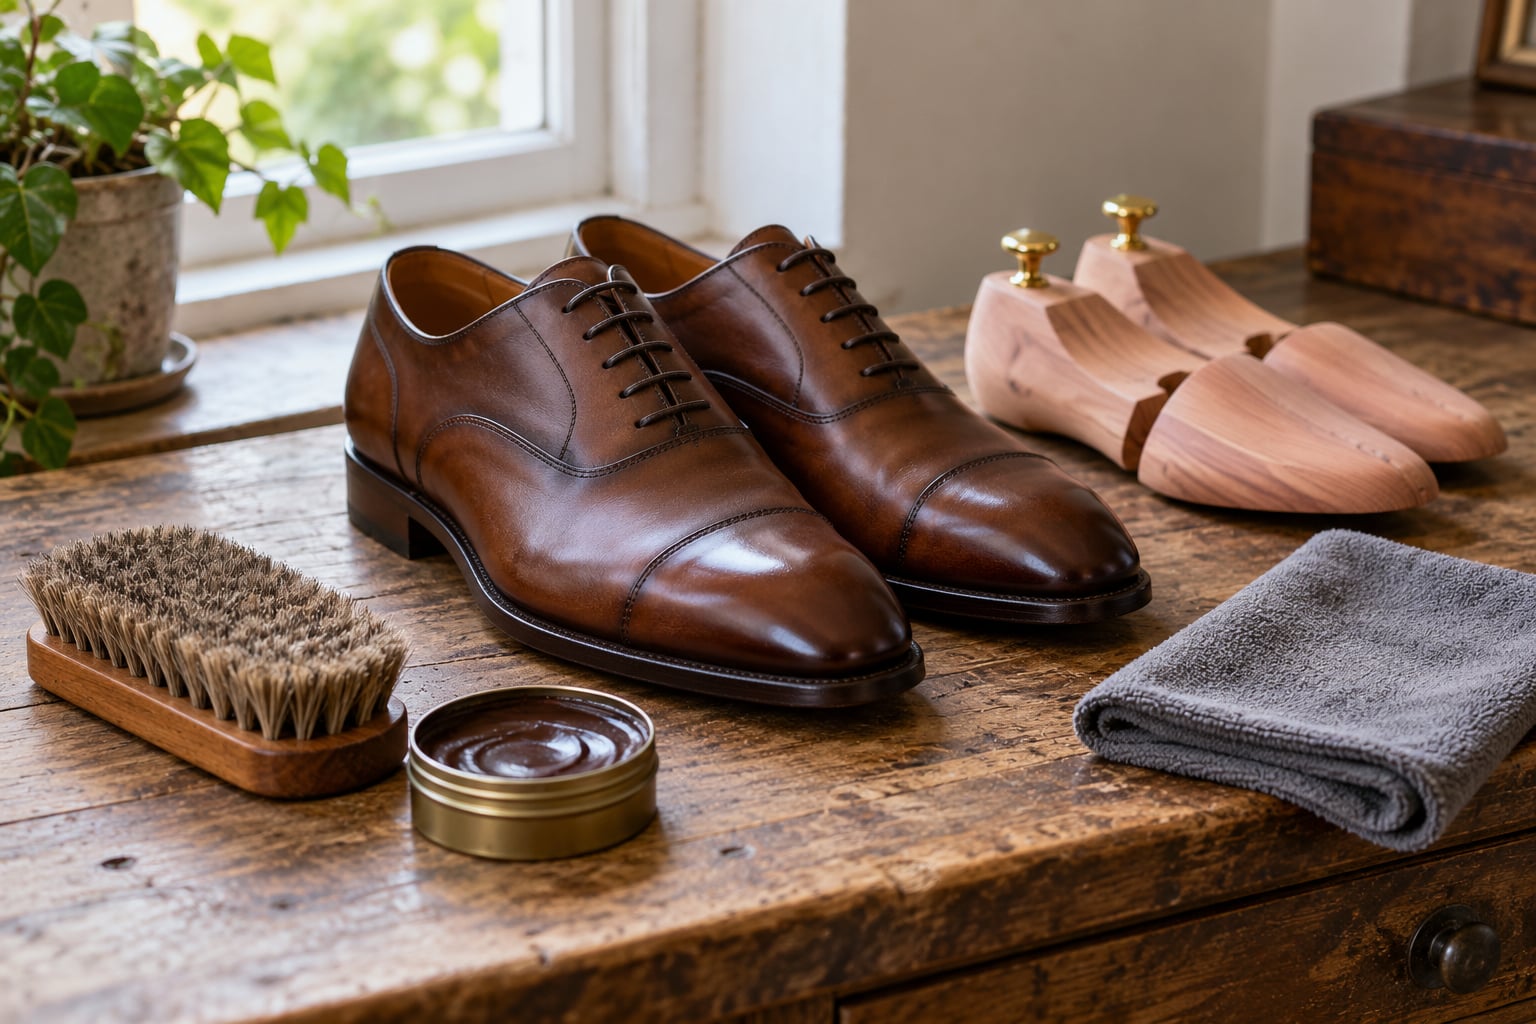
Gather these before you start. Everything on the essentials list is cheap and lasts for years, and most people end up using four or five of the six.
- A horsehair brush. The soft horsehair lifts dust and grit out of the grain without scratching the finish. For suede and nubuck you want a rubber crepe brush instead, which lifts nap without pulling fibres out.
- Saddle soap or a pH-neutral leather cleaner. Saddle soap is the traditional choice for finished and full-grain leather; a liquid cleaner works well on a shoe with welted seams and heavy creasing where soap is hard to get into the edges.
- Leather conditioner. A lotion or cream, not an oil, if you own dress shoes. Oils soak in fast and go rancid; creams stay controllable.
- Shoe cream matched to your colour, plus a wax polish. Cream re-colours and softens; wax seals and shines. You need cream only if the leather has lost colour, wax only if you want gloss and a stronger water barrier.
- Two soft cotton or microfiber cloths. One for applying, one clean and dry for buffing. Keep them separate or you will smear product instead of lifting it.
- Shoe trees. Cedar or a decent plastic pair for full-grain and finished leather. Skip them for patent and coated leather, which do not breathe and can haze.
Optional, and only worth buying once the routine is second nature: a suede eraser and crepe brush, a neutral polish for mixed-colour wardrobes, an edge dressing for worn welt edges, and a waterproofing spray formulated for your specific finish.
How to Care for Leather Shoes Step by Step
Order matters more than any single product, and this is the part most guides bury. You clean first so you are not sealing dirt in, condition second so the leather is soft enough to take colour, add cream third to put pigment back, and wax last to seal everything. Reversing any pair of those steps traps whatever was underneath, which is why shoes look smeared and blotchy for weeks afterward.
How to Care for Leather Shoes by Leather Type
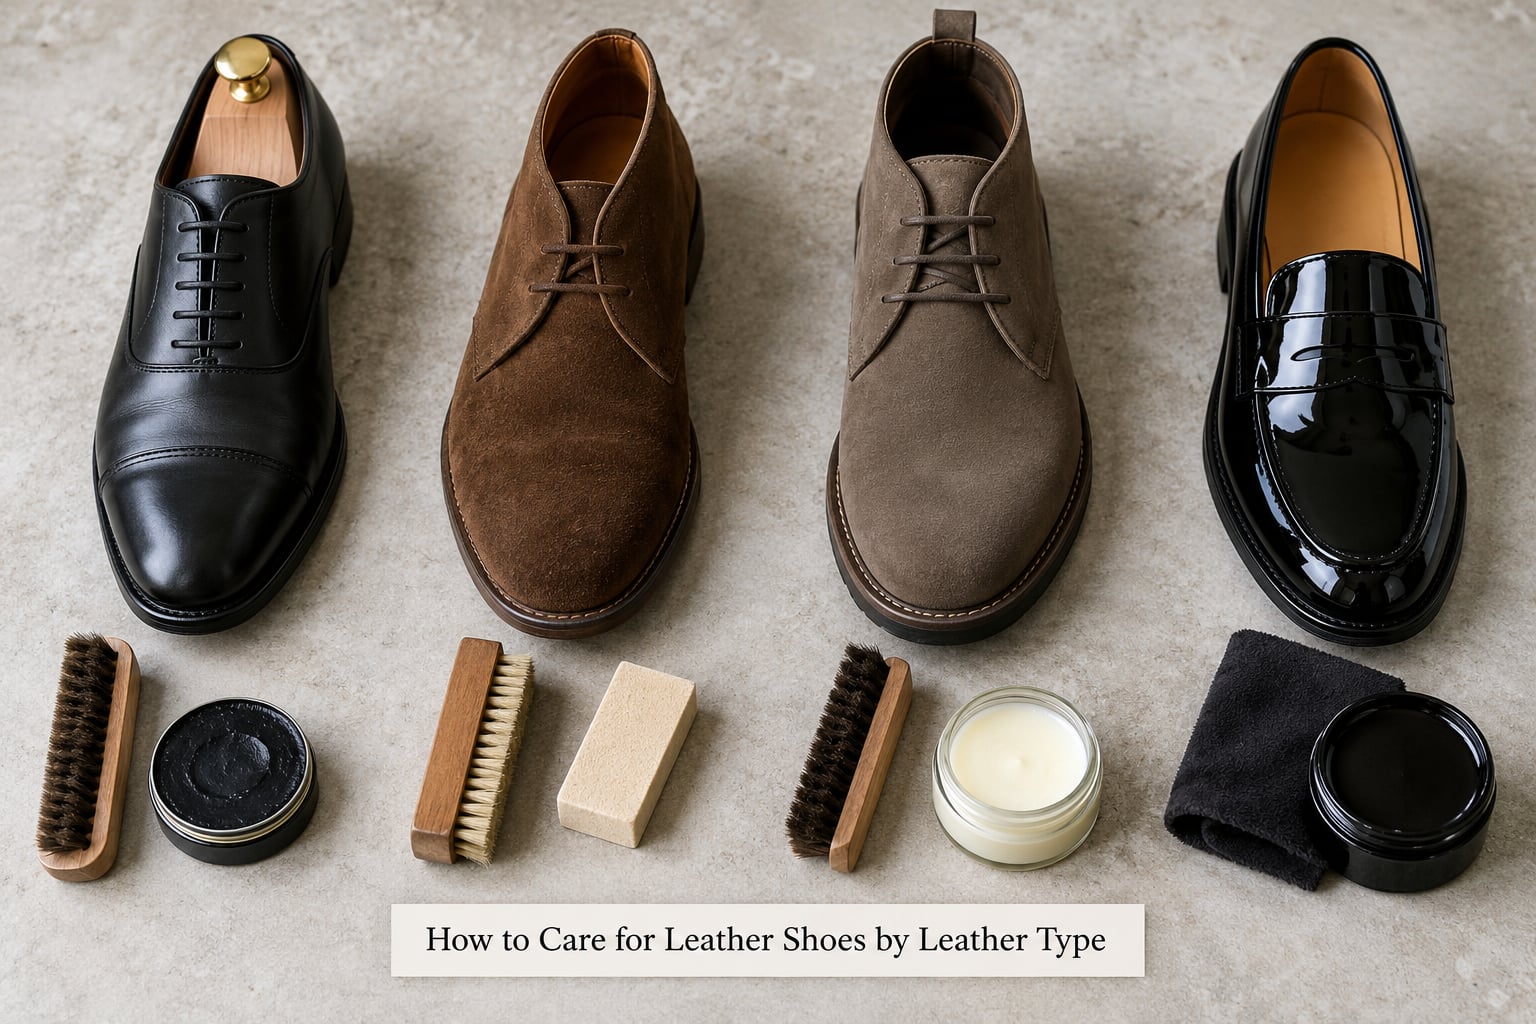
Before you use anything, work out which animal you are dealing with. Run a finger across the surface: smooth and slightly shiny means finished leather, velvety and direction-sensitive means suede or nubuck, glassy and reflective means patent. An unfinished full-grain hide scratches with a fingernail and shows every mark, which tells you it is untreated and hungry for conditioner.
| Leather type | How to spot it | Clean with | Condition or polish | Never use |
|---|---|---|---|---|
| Finished or corrected-grain | Even surface, light sheen, scratches with a fingernail only faintly | Saddle soap or leather cleaner, damp cloth | Leather conditioner, then cream and wax | Saddle soap if the finish is coated; scrubbing |
| Full-grain or unfinished | Visible pores, varied tone, scuffs easily, softens when pressed | Saddle soap, minimal water | Conditioner every few weeks, wax optional | Anything pigmented, which mutes the patina |
| Suede | Brushed nap, colour shifts when you stroke it, no shine | Dry crepe brush, then a suede cleaner sparingly | Suede conditioner spray only, applied lightly | Saddle soap, mink oil, wax polish, soaking |
| Nubuck | Suede-like but finer, tighter nap, darker when brushed | Soft brush, then a nubuck-specific cleaner | Water-based protector spray, not cream | Heavy cream, oil, polish |
| Patent | Glassy, mirror-like, creases sharply | Soft damp cloth only | None, or a patent cream for small scuffs | Saddle soap, conditioner, water-based sprays |
| Exotic | Visible scales, grain variation, pronounced natural markings | Dry soft brush, barely damp cloth | Product approved by the maker, in small amounts | Standard conditioner; oils darken scale edges |
Suede and nubuck are the two people ruin most often, usually by putting a smooth-leather cream on them. It sits on the surface instead of feeding the fibres, goes dark at every rub, and never fully comes off. If you have already done that, keep going; the marks fade across a few careful cleanings rather than instantly.
1. Test the Cleaner in a Hidden Area
Put shoe trees in, then test whatever you plan to use on the inside of the tongue or along an inner seam. Wait the full drying time before judging, because a cleaner can look fine wet and go blotchy, stiff or pale once it dries. Watch for colour transfer onto your finger or cloth, a change in shade, a waxy film, or leather that feels tight rather than supple. Any of those and you move to a milder product. A spot test costs a minute and saves a shoe.
2. Remove Dirt with the Right Brush
Take the laces out and knock the soles together first; a surprising amount of dried mud falls out that way. Then brush with the horsehair brush, working toe to heel in long strokes so you lift grit out of the grain instead of grinding it deeper. For suede and nubuck, use the crepe brush in one direction only and change direction only when the nap is fully lifted. Heavy creases and the welt edge get a few gentle circles with the brush tip.
3. Clean the Leather Gently
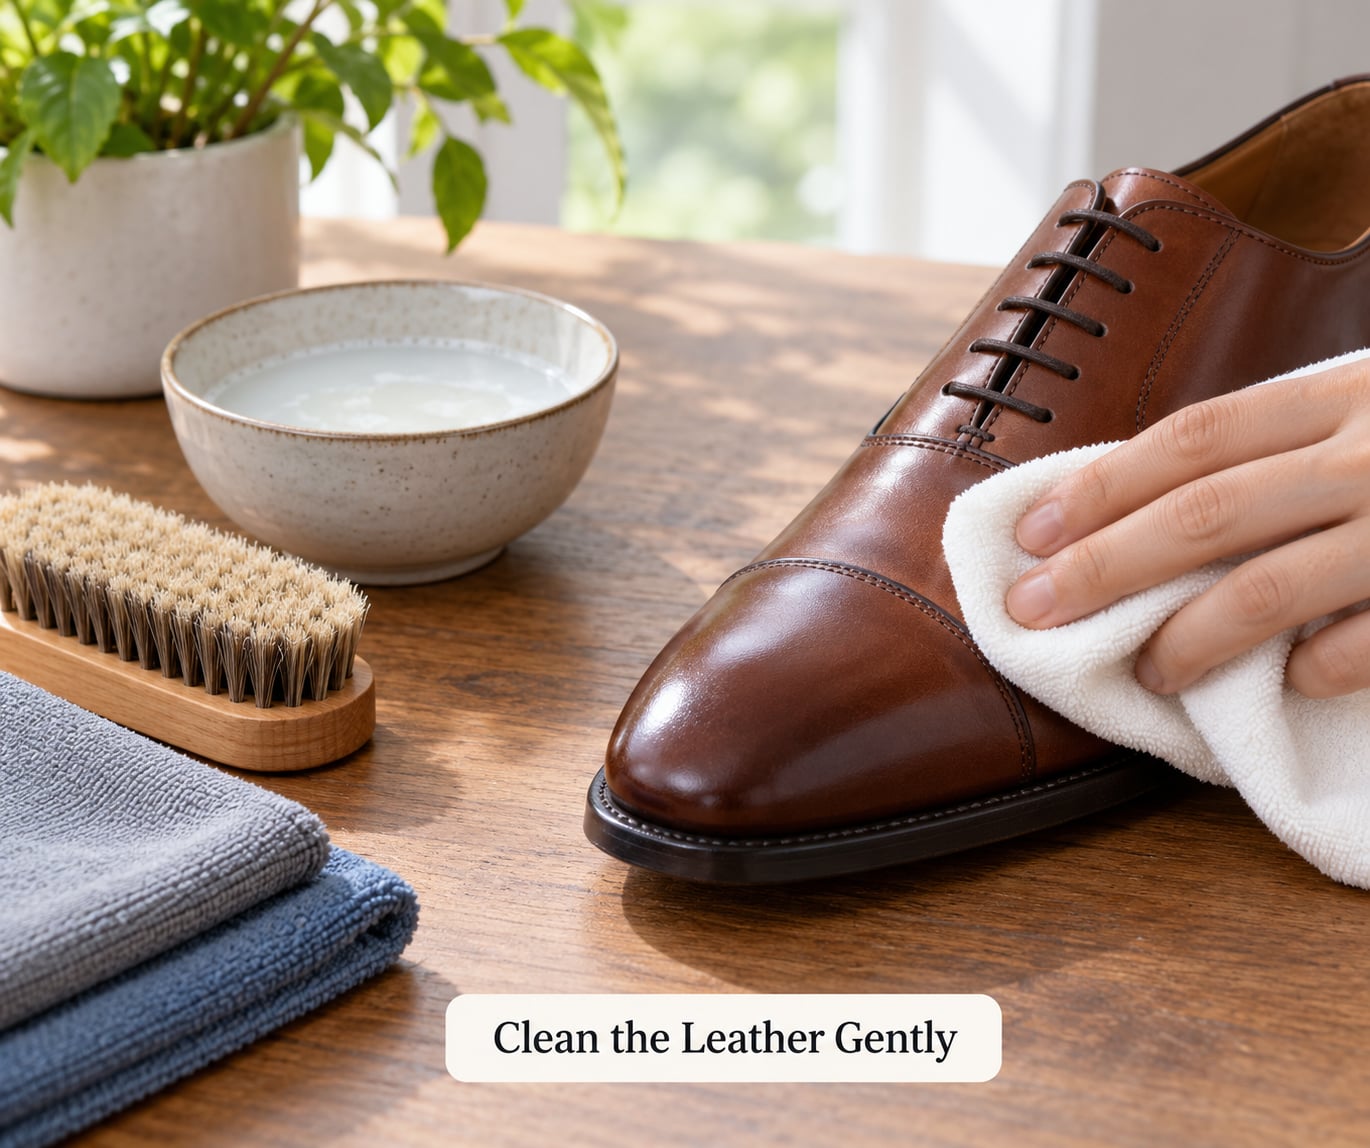
Work a thin lather of saddle soap onto a damp cloth rather than onto the shoe, and wipe the whole upper in sections so you control the amount. On smooth leather this is where you remove old conditioner residue and grime, so do not rush it. On suede, keep it nearly dry and blot rather than rub. On patent, use barely damp water on a soft cloth and nothing else. Never soak a shoe, never scrub, and never use dish soap or a general household spray, which strip the oils along with the dirt. Wipe off all residue with a second clean damp cloth before anything dries.
4. Air-Dry Away from Heat and Sun
Stuff the shoes with newspaper, paper towels or a shoe tree to draw moisture from the inside and hold the shape, and swap the stuffing once it saturates. Let them dry at room temperature, out of direct sunlight, for a day or two. Heat from a radiator, hair dryer, tumble dryer or a sunny windowsill pushes water out of the fibres faster than the leather can release it evenly, and that mismatch is what produces cracking and permanent creases.
5. Condition When the Leather Feels Dry
Condition while the leather is still faintly damp from cleaning, when the product spreads further and soaks in properly. Use about a coin-sized amount per shoe, warmed between your palms and worked in with your fingers in slow circles rather than dumped on and left. Give it five to ten minutes to absorb, then buff with a clean cloth until nothing transfers. More is not better: leftover conditioner stays greasy, attracts dust and can cause dye transfer onto other shoes in your bag. If the shoe is dark and dye is flaking, cut the amount in half and test again.
6. Protect the Shoes from Water and Stains
Finish with a spray formulated for the leather you actually have, tested on the hidden area first and applied outdoors or well ventilated. Smooth leather takes a water-and-stain repellent; suede and nubuck need a dedicated protector, because a coating designed for smooth leather saturates their nap. Patent and coated leather need nothing. Reapply after a heavy season of rain and snow, and after any deep cleaning, since both cleaner and conditioner remove protection.
7. Buff and Store for the Long Term
Apply cream thinly where colour has faded, let it sit five to ten minutes, then buff. Add wax to the toe and heel, the high-friction zones, and burnish the welt edge with the brush side for a little more depth. For storage, roll the shoe trees in and leave the shoes on an open shelf or in a breathable cloth bag, away from radiators and sunlight, with the soles never touching a damp wall. The cardboard box the shoes came in is the worst option available, because it traps moisture and breeds mold.
Common Mistakes
Almost every ruined pair of leather shoes traces back to one of these, and the fix is nearly always the gentler version of the same action.
- Using one cleaner for every finish. Saddle soap and cream polish destroy suede and nubuck nap. Match the product to the leather, per the table above.
- Petroleum jelly as a leather treatment. It does not preserve leather. It seals the surface against the very oils the leather needs, blocks breathability, goes yellow with age and traps dirt against the finish. Use a purpose-made conditioner instead.
- Dish soap, bleach and all-purpose household sprays. They are engineered to strip grease, and they take the leather’s natural oils with the dirt, leaving a dry, blotchy surface. Baby wipes and alcohol behave the same way.
- Silicone-based sprays and generic waterproofing products. They sit on top of the finish, yellow over time, are near-impossible to remove and ruin the resale value of a good pair.
- The washing machine. Agitation, detergent and prolonged soaking destroy the glue in a welted shoe, the dye on the upper and the shape. Clean by hand, always.
- Over-application of conditioner. The surface turns greasy, attracts dust and dusts the rest of your wardrobe. Buff off anything still there after ten minutes.
- Storage in plastic bags or the original box. Both trap humidity and can lead to mold, mildew and dye transfer. Use breathable cloth bags or an open shelf.
- Forgetting the soles and edges. The welt edge takes the most abrasion and gets the least care. Run a small amount of edge dressing or wax along it a couple of times a year.
Mold is the one problem people want an exact answer for, so here it is: remove visible growth with a lightly diluted isopropyl alcohol solution on a soft cloth, dabbing rather than rubbing, keep the shoe moving in open air afterwards, and expect the smell to take days to clear. If the leather is stiff or discoloured underneath the mold, stop there and see a cobbler.
| Problem | What causes it | Home fix | See a cobbler when |
|---|---|---|---|
| Scuff marks | Friction against another surface | Dark marks on finished leather: cream polish worked in, then buffed. Suede: crepe brush or suede eraser | The grain is torn or a pale patch remains where the dye is gone |
| Salt stains | Dried sea salt eating into the finish | Wipe with a lightly damp cloth, then dab with distilled water and a drop of mild soap, dry in shade, re-protect | Stains have set into cracked or suede leather |
| Water marks | Dried water carrying dirt and minerals | Even, barely damp application of cleaner on the whole panel, then condition and dry slowly | The mark is in the grain of a delicate or exotic hide |
| Creases | Normal flexing plus drying out | Condition generously and stuff the shoe tightly so it dries expanded, repeat a few times | Deep folds have become splits or the leather will not flex back |
| Mold or mildew | Humidity in a closed box or bag | Lightly diluted isopropyl alcohol applied by dabbing, then air out for days | The leather underneath is stiff, stained or shedding |
| Stiffness | Never conditioned, or dried out with heat | Heavy conditioning, warm damp cloth, and slow drying with the shoe stuffed | Cracks run deep or the leather flakes as it bends |
| Dye transfer or flaking | Cheap finish, or a new pigmented cream on old leather | Stop adding pigment, wipe with a barely damp cloth, condition the bare leather only | Finish is separating from the hide across a wide area |
Quick Tips for Keeping Leather Shoes in Better Shape
A few habits do more than any single deep clean. Wipe off dust and grit the evening you wear a pair, before it works into the grain. Leave a shoe tree in overnight and alternate two pairs rather than wearing one until it drops, which gives the leather time to recover its shape and dry fully. Treat a spill while it is fresh: blot, do not rub, and blot again with a clean section of cloth. Schedule a proper clean and condition every few weeks for daily boots, every couple of months for dress shoes, and once a year for anything you rotate lightly. Check the manufacturer’s care label before you start, because coated uppers and glued decorative panels have their own rules.
On breaking in, a stiff full-grain or unfinished leather usually moulds to your foot over roughly two to three weeks of regular wear, and closer to a month for boots; patent and coated leather barely breaks in at all, so buy those half a size up. You can shorten it by wearing thin socks and lacing loosely at first, by dabbing the tongue and heel with a leather conditioner a week before you need them, and by never storing new shoes tightly laced for long periods.
Book a cobbler for structural work, burnishing, mirror shine, full re-dyeing, sole replacement, or anything where the upper is cracked through, flaking, or stained beyond what a cream can lift. That is routine for them and usually cheaper than replacing a good shoe.
Frequently Asked Questions
Can I use a household cleaner on leather shoes?
Skip dish soap, bleach, all-purpose sprays, alcohol and baby wipes. They are formulated to strip grease, and leather is porous and fibrous, so they take the natural oils out along with the dirt and leave the finish dry and blotchy. Use saddle soap or a pH-neutral leather cleaner instead, tested on an inside seam first. If a spill happens and nothing else is to hand, blot with plain water and dry the shoe away from heat.
How do I clean leather shoes that have gotten wet?
Stuff them with newspaper or paper towels, change the stuffing once it saturates, and let them air-dry at room temperature for a day or two. Never use a hair dryer, radiator or vent, because direct heat dries the fibres faster than the leather can release the water, and that mismatch is what leads to cracking. Condition lightly while they are still slightly damp rather than waiting until they are bone dry.
What is the best way to clean suede shoes?
Dry first, then brush. Lift dust and dried mud with a rubber crepe brush, working in one direction, and use a suede eraser for stubborn marks. If the nap is genuinely dirty, apply a water-based suede cleaner sparingly and blot with a clean cloth. Skip saddle soap, mink oil and wax polish, because they flatten the nap and leave dark patches that take several cleanings to shift.
How often should I condition leather shoes?
Condition when the leather feels dry rather than to a fixed calendar, since it depends on how much you wear them and how dry the air is. A rough guide: full-grain boots worn daily, every few weeks; dress shoes worn a few times a week, every couple of months; patent and coated leather, never. Use about a coin-sized amount per shoe and buff off anything still there after ten minutes.
Can I remove scuffs from leather shoes at home?
Most of them. A dark mark on finished leather comes off with a soft cloth and a little cream polish worked in, then buffed. Superficial scuffs on suede lift with a rubber crepe brush or an eraser. If the grain is torn, if there is a hole, or if a pale mark remains where the dye has gone, the colour is gone from the leather itself and only re-dyeing by a cobbler fixes it.
Conclusion
Start by identifying the finish, then use the gentlest thing that works: brush first, clean sparingly, condition lightly, protect and buff, and store in something breathable. Most damage comes from a product that was too strong for that particular leather, not from too little care. Do the full routine once to set the baseline, and you can look after each pair in ten minutes a month after that.