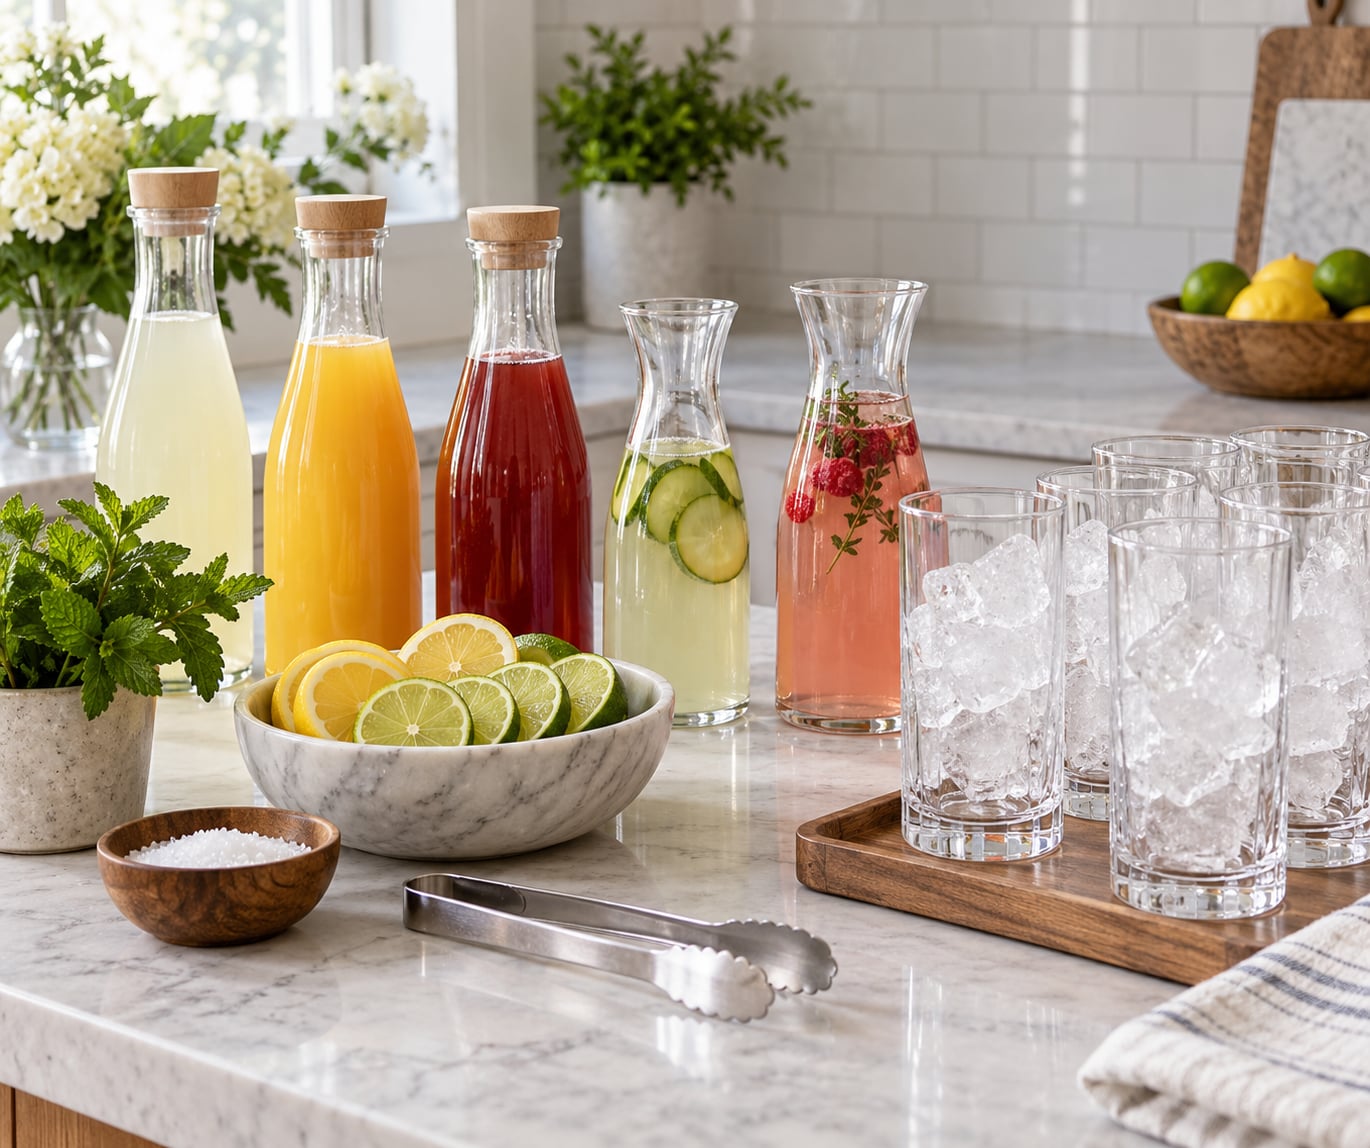
A home mocktail bar is a self-serve drink station you build at home: zero-proof bases, mixers and juices, ice, fresh garnishes, real glassware and a few tools, arranged so guests can make their own drinks and you stay out of the kitchen. Knowing how to build a home bar for mocktails takes about an hour of setup and a menu of three to five drinks, not a shelf of specialty equipment.
The build goes in four moves:
- Choose a surface and clear it completely.
- Line up the bases, mixers and syrups, grouped by drink.
- Set up a separate garnish and ice zone so nobody queues in one spot.
- Finish with glassware, tools and a short recipe card for each drink.
What separates a mocktail from a glass of sweet soda is boring and repeatable: a real glass, plenty of ice, fresh citrus, and a name for the drink. Hosts on r/stopdrinking describe that same combination over and over as the thing that makes a non-alcoholic drink feel intentional. Get those four details right and the rest of the bar mostly arranges itself.
Table of Contents
What You Need
Here is the working inventory for a home mocktail bar that serves six to ten people, plus what you can skip or borrow. Everything on the list is a normal household object, not bar equipment.
Equipment
- One surface: a kitchen counter, a rolling bar cart, a baker’s rack, a folding table, or a large baking sheet on a cleared counter.
- A covered ice bucket or a cooler, so ice stays cold without melting into a puddle on the table.
- Serving tongs for ice and fruit, a small knife, and a cutting board set off to the side.
- A 2-ounce measure, or a jigger if you own one. A small measuring cup works fine.
- A jar with a lid for shaking, a fine-mesh sieve for straining citrus, and stir sticks or straws.
- Index cards or small tent cards and a pen for labels and builds.
- A small bowl or bin for spent citrus, so the counter stays usable for two hours.
Ingredients
- Two or three mixers: sparkling water, tonic, club soda, or a dry ginger beer.
- Two juices: fresh citrus juice, plus one with body, such as pomegranate, pineapple, or cranberry.
- One brewed base: hibiscus tea, iced tea, or cold-brew coffee for a darker option.
- One sweetener: a simple syrup you can adjust, or an unseeded sweetener if a guest is avoiding seeds.
- Two acids: lemon and lime, with a mandarin or grapefruit for a brighter edge.
- One bitter or spice note: non-alcoholic bitters, cinnamon sticks, star anise, or a pinch of chili salt.
- Garnishes: citrus wheels, herbs like mint, basil, or rosemary, and a rim salt mix.
Glassware and service items
Two glass shapes cover almost everything. A highball or rocks glass handles anything served over ice, and a stemmed glass handles spritzes, coolers, and anything you want to look like a cocktail. Set out one glass per guest plus two extras, and put a few cups and a stack of napkins nearby for anyone who would rather not commit to a full glass. Ice runs about 1 to 1.5 pounds per guest, so a single bag will not carry a party of six.
Borrow what you do not have. A pitcher shakes, a sieve strains, a baking sheet becomes a tray, and a jam jar with a hand-written label is a perfectly good mixer bottle. Quantities scale with guest count, not ambition: the per-guest math in step 4 holds at any size, so double it for twelve people and triple it for eighteen.
Step-by-Step
Six steps, in order. Each one tells you what to do and how you will know it worked.
1. Choose a Mocktail Menu
Three to five drinks is the right number. Fewer and the station runs dry, more and nobody can remember the options by the second round. Aim for a spread of profiles rather than five variations on the same sour citrus drink.
Build the menu around three anchors:
- A crowd-pleaser, usually something fizzy and slightly bitter, like a spritz-style drink with tonic and a splash of citrus.
- A bright citrus option, which is the one people reach for when they want it to taste refreshing rather than sweet.
- A creamy or spiced option, made with tea, coconut, or a muddled herb and sugar, so the menu is not all fizz.
Two more can cover guests who want something darker or more bitter. Write the menu down before you shop; the list of drinks determines everything you buy, not the other way around.
For servings, plan one and a half finished drinks per guest for a party under two hours, and closer to two for a longer evening. Forum advice in r/partyplanning circles around serving the same base drink two ways for a mixed group, with spirits offered at the side so alcohol stays optional and nobody is singled out. It works just as well in reverse: a mocktail menu that anyone can pour from, plus bottles of spirits on a separate tray for the guests who want them.
You will know the menu is right when every drink shares at least two ingredients with another one on the list. That is what keeps your shopping list short.
2. Stock a Simple Drink Lineup
Organize the bottles by the drink they belong to, not by type. Grouping by drink means a guest can look at one cluster, understand it, and build it without asking you anything.
A core lineup covers most recipes:
- A dry sparkling base, one or two bottles, for lift and length.
- A bitter or tonic-style mixer, which is the single ingredient that makes a zero-proof drink read as a cocktail rather than juice.
- Fresh lemon and lime juice, plus one bottled juice for volume.
- A brewed base such as hibiscus tea or iced tea, chilled in advance.
- One syrup, kept light so the drinks do not turn cloying after the second sip.
- Salt, bitters, or a spice element, used sparingly.
Batching the ingredients by drink is what saves you time later. If your spritz is tonic, citrus, and syrup, pour those into one labeled carafe in the ratio for the whole party. A guest picks up the carafe, pours over ice, tops with bubbles, and is done.
Buy the second bottle of a mixer only when a recipe needs more of it than one bottle holds. Running out of the popular drink at hour two is the most common complaint in mocktail threads, and a backup bottle of the mixer nobody bought is the fix.
You will know the lineup works when each carafe covers at least one full round for your guest count, with about a quarter left over.
3. Set Up the Bar Area
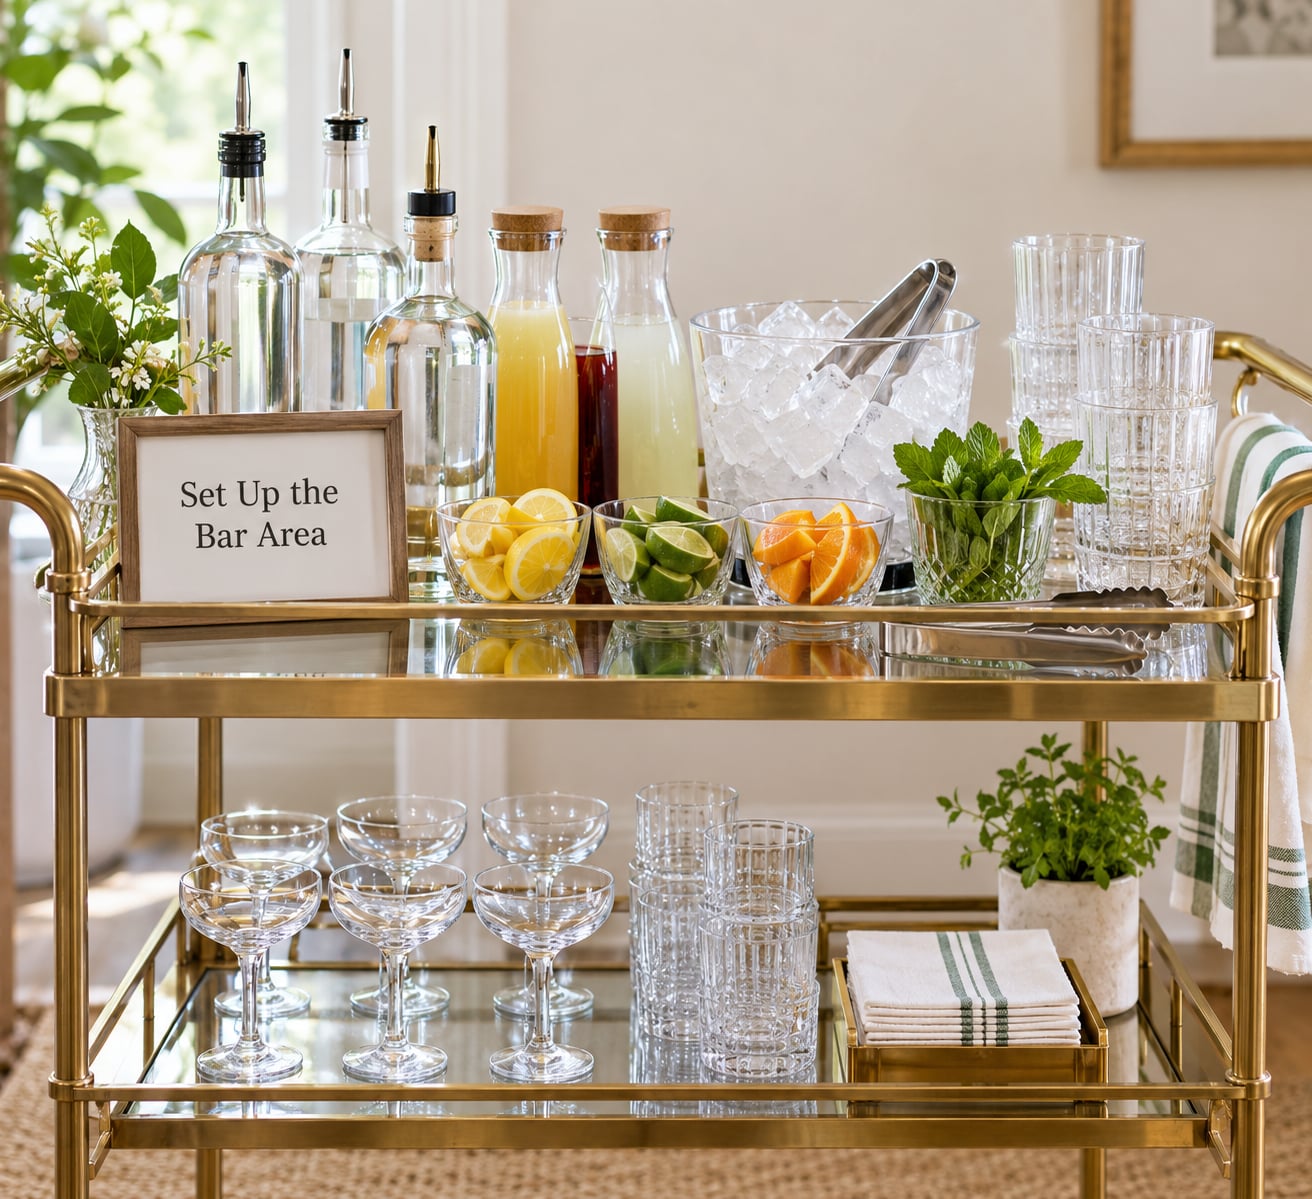
Pick the surface by how often you will use the bar. A counter or baker’s rack suits a permanent setup you can keep dressed. A cart or folding table suits parties and can be folded away afterward. Most hosts are better served by the cheapest workable surface, which is usually whatever is already in the kitchen.
Give yourself about 24 inches of table per serving drink. Then work left to right in the order people will use it:
- Glassware and cups, at the start of the line.
- The drink carafes, with cards standing next to each one.
- Ice in a covered bucket with tongs, or a second bucket for extra cubes.
- Garnishes on a small tray with their own tongs, plus a rim salt dish.
- Straws, stir sticks, napkins, and a waste bowl at the end.
Keeping ice and garnish separate from the bottles is the detail that prevents a traffic jam. Ten guests all reaching for lemon wedges at once is the moment a drink station turns into a bottleneck.
Keep the surface dry, keep glass away from the front edge, and set any hot appliance or candle well away from paper labels and alcohol bottles. If the surface is a folding table, lock the legs and put a non-slip mat under it. A covered ice bucket keeps meltwater off the wood and off your labels.
You will know the layout works when a guest can walk up, pour a drink, garnish it, and walk away without your help.
4. How to Build a Home Bar for Mocktails for Six Guests
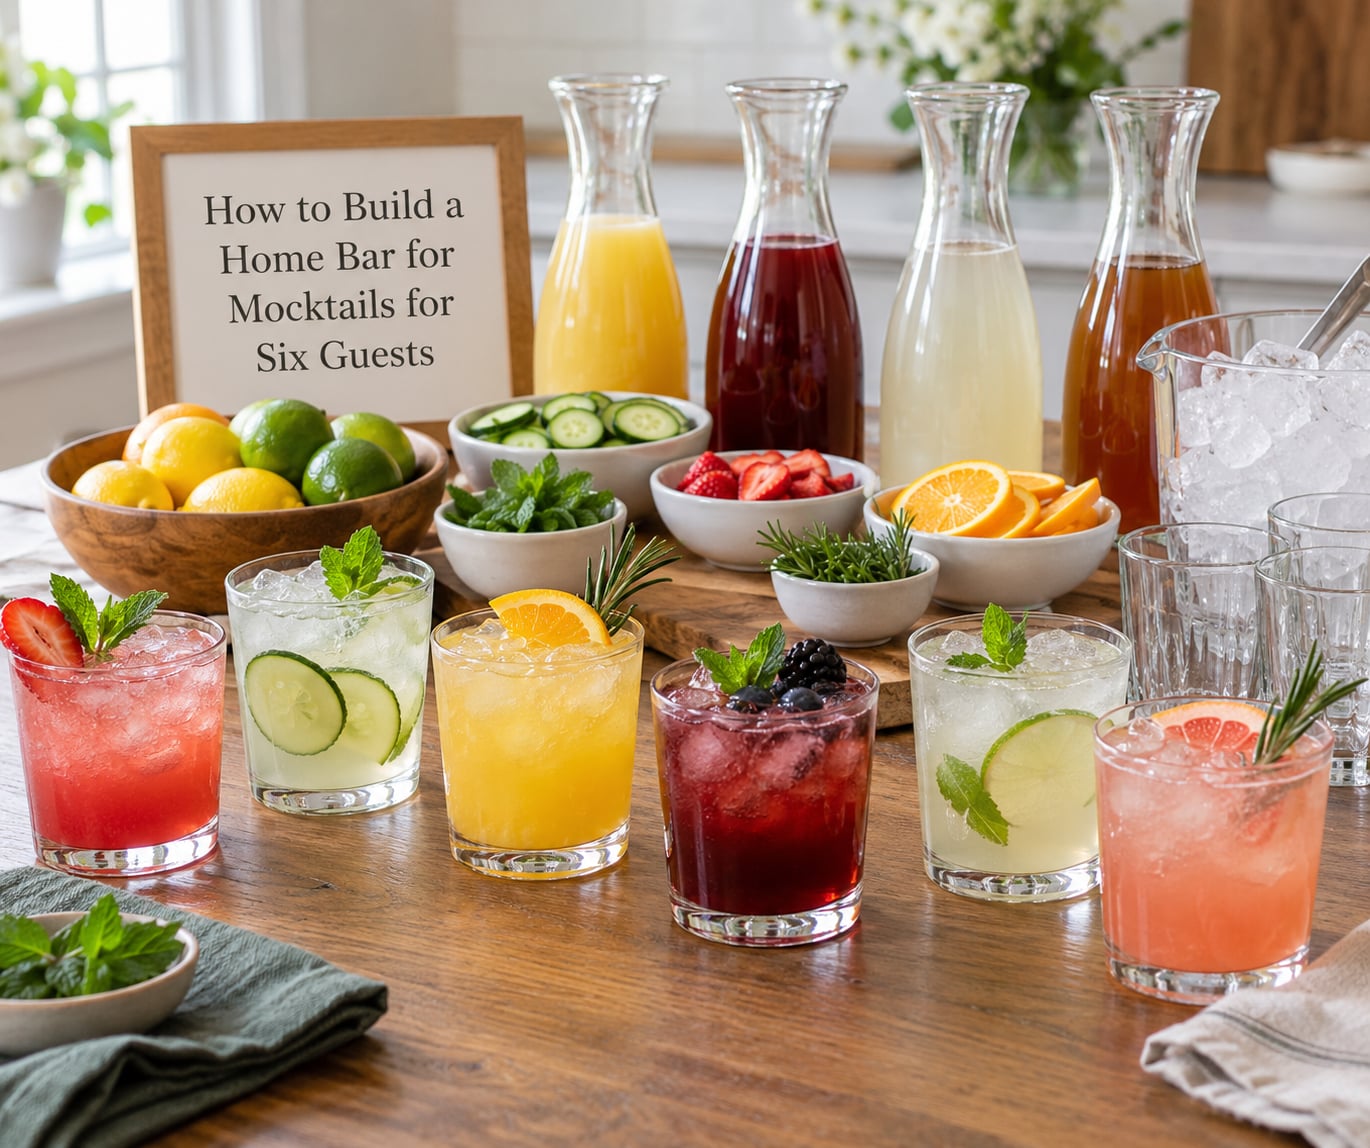
Six people is the easiest size to plan, and it makes a good test run before a bigger event. Here is the working quantity list.
| Item | Per guest | For six guests |
|---|---|---|
| Finished drinks | 1.5 to 2 | 9 to 12 |
| Mixer and base liquid | 6 to 8 oz | 2 to 3 quarts |
| Ice | 1 to 1.5 lb | 8 to 10 lb |
| Glasses | 1, plus spares | 8 glasses |
| Fresh citrus for juice | 2 to 3 lemons or limes | 12 to 18 pieces |
| Garnish fruit | 1 to 2 slices | 1 sliced lemon, 1 bunch of herbs |
Translate the menu into numbers drink by drink. If you are serving three drinks to six people, that is about three servings each in the first hour, so each carafe only needs to hold two to three servings. Batch the bases, then keep bubbles and garnishes for last.
Preventing a short menu from running out is mostly arithmetic and placement. Overfill the popular drink rather than splitting the batch evenly, refill it before the bowl looks low, and put an extra bottle of its main mixer behind the station. Hosts who ran out mid-party usually served one flavor to everyone and ran out of the one thing everybody wanted.
Cut citrus the day before and store the slices covered in the refrigerator, or cut it the morning of and keep it airtight so the cut surfaces do not dry out. Refrigerate any tea-based base the same night you brew it, and give it at least four hours to chill so it pours cold without watering the ice down.
5. Make Drinks Batched and Consistent
Pre-mix the non-carbonated parts of each recipe in a labeled carafe, in the ratio for the whole party. That is the single biggest time saver, because the last hour of a party is not the time to be measuring syrup by eye.
A few rules keep a batch tasting deliberate:
- Dilute over ice at serve time, never in the carafe. Ice in the batch goes flat and watery by the third pour.
- Add sparkling ingredients last, per pour, so the drinks arrive with bubbles instead of foam.
- Taste the batch cold, before anyone else does, and adjust acid and sweetness then.
- Write the build on a card in ounces, not in ratios. Guests read faster and mix better that way.
- Test every recipe once, cold, before guests arrive. You will catch the missing acid immediately.
If a recipe includes fresh herbs, muddle them into the base and let them sit for 20 minutes, then strain. Skipping that step is why a drink tastes thin even with the right ingredients.
You will know batching worked when the last drink of the night tastes like the first one.
6. Serve, Garnish, and Refine
Garnish at the last possible moment. A citrus wheel or a sprig of mint added an hour early goes brown, wilts, and stops smelling like anything. Set garnishes in a covered dish with damp paper underneath, and top them up every thirty minutes or so.
Choose the glass to match the drink. Fizz and highballs in a tall glass over large cubes, which melt slowly and look better in a photo. Spritz-style drinks in a stemmed glass with ice that barely covers the bottom. Coolers and batched drinks in a pitcher or a small carafe so guests can pour their own refill.
Label what matters without turning the bar into a disclaimer. A short list of common ingredients, including anything with dairy, nuts, or seeds, sits on one card. Mark anything sweetened with a seeded syrup so a guest who avoids seeds is not guessing.
Give every drink a name. A signature drink with a real name gets talked about and photographed; a bowl of generic punch does not. A named drink also solves the awkwardness of explaining the bar, since nobody has to announce that half the room is not drinking.
Collect feedback the next day rather than during the party. Ask which drink ran out, which nobody touched, and which one people asked about. Keep the winners, retire the losers, and build your permanent home mocktail bar from what actually got poured.
You will know the bar is working when guests stop asking what is in the carafes.
Common Mistakes
These are the problems that come up most often, and the fix for each.
- Too many recipes. Five drinks is already a lot. Cut to three, or put the extras on a printed card as a suggestion rather than a station option.
- Buying equipment first. A shaker, jiggers, and a bar cart do not make a good drink. Ingredients and garnish do. Buy gear only after you know what you are pouring.
- Weak or stale ingredients. Old herbs, flat syrup, and bottled juice past their best date make everything taste like a leftover. Make the simple syrup fresh, keep juices cold, and toss anything that has turned.
- Overly sweet drinks. Store-bought pre-sweetened mix is the usual reason a mocktail tastes like juice. Use unsweetened bases and add your own syrup, a spoonful at a time.
- Not enough glass or ice. One glass and one and a half pounds of ice per guest, plus extras. Under-ice drinks get watery fast and the station looks empty by the second hour.
- Adding carbonation too early. Soda and tonic belong in the glass, at the last second, or the whole carafe goes flat.
- Skipping labels. A drink with a name and a two-line build needs no explanation, which keeps the station self-serve and keeps the host out of the kitchen.
One hosting tip worth stealing from wedding planning threads: the drinks people remember are the interactive ones. Let guests rim a glass with salt, muddle their own mint, or pick from a build-your-own line of three bases and two mixers. A station that does something tends to outlive a station that only pours.
Frequently Asked Questions
Do I need special equipment to make a mocktail bar?
No. A pitcher, a jar with a lid, a fine-mesh sieve, and a baking sheet or tray will get you through most recipes. The only items worth owning early are a 2-ounce measure, tongs, and a covered ice bucket. Everything else can be borrowed from the kitchen, and a jam jar with a hand-written label works as a mixer bottle. Buy dedicated bar gear only after you know which drinks you actually serve.
How many mocktail recipes should I offer at a party?
Three to five is the sweet spot. Three keeps the shopping list short and lets you batch each drink properly. Five is the ceiling for a home setup, because past that, guests cannot remember the options and the popular drink runs out early. Make sure every recipe shares at least two ingredients with another one, which is what keeps the total shopping list down to a manageable size.
Can I prepare mocktails ahead of time?
Yes, with one exception. Batch everything except the sparkling ingredients: pre-mix bases, syrups, acids, and juices in labeled carafes, then refrigerate and add tonic, soda, or ginger beer at the last second so the drinks keep their bubbles. Keep garnishes fresh until serving. Ice never goes in the batch, because a carafe that has sat on ice turns flat and watery by the third pour.
What ingredients work well for a beginner home bar?
Start with a short list that overlaps across recipes: one dry sparkling water or tonic, fresh lemon and lime juice, one bottled juice with body, a brewed base such as hibiscus tea, and a light simple syrup. Add a bitter or spice note, a rim salt, and fresh herbs for garnish. That combination builds a spritz, a bright citrus cooler, and a spiced tea drink without a specialty store trip.
How do I keep a mocktail bar organized and safe for guests?
Give yourself about 24 inches of surface per drink, then arrange the station in the order guests use it: glassware, carafes with recipe cards, ice in a covered bucket, garnishes on their own tray, then straws, napkins, and a waste bowl. Keep ice and garnish away from the bottle line to prevent crowding. Use a covered bucket and a non-slip mat under a folding table, and keep glassware back from the table edge.
Conclusion: Start With One Signature Drink
Building a home mocktail bar comes down to a cleared surface, a short menu of drinks that share ingredients, a separate ice and garnish zone, and real glasses. Batch the bases, add the bubbles at the last second, and give every drink a name and a two-line build so guests can serve themselves.
Start smaller than feels sensible: one polished signature drink, two complementary backups, a stack of highballs and one stemmed glass shape, and a small supply of citrus and herbs. Skip the bar cart for now and use whatever counter or table you already have, then decide after your first party whether a permanent home mocktail bar is worth the space.